How To Use It
Tear-Aid Repair Patches protect against abrasion, moisture, saltwater, UV sunlight and extreme temperatures.
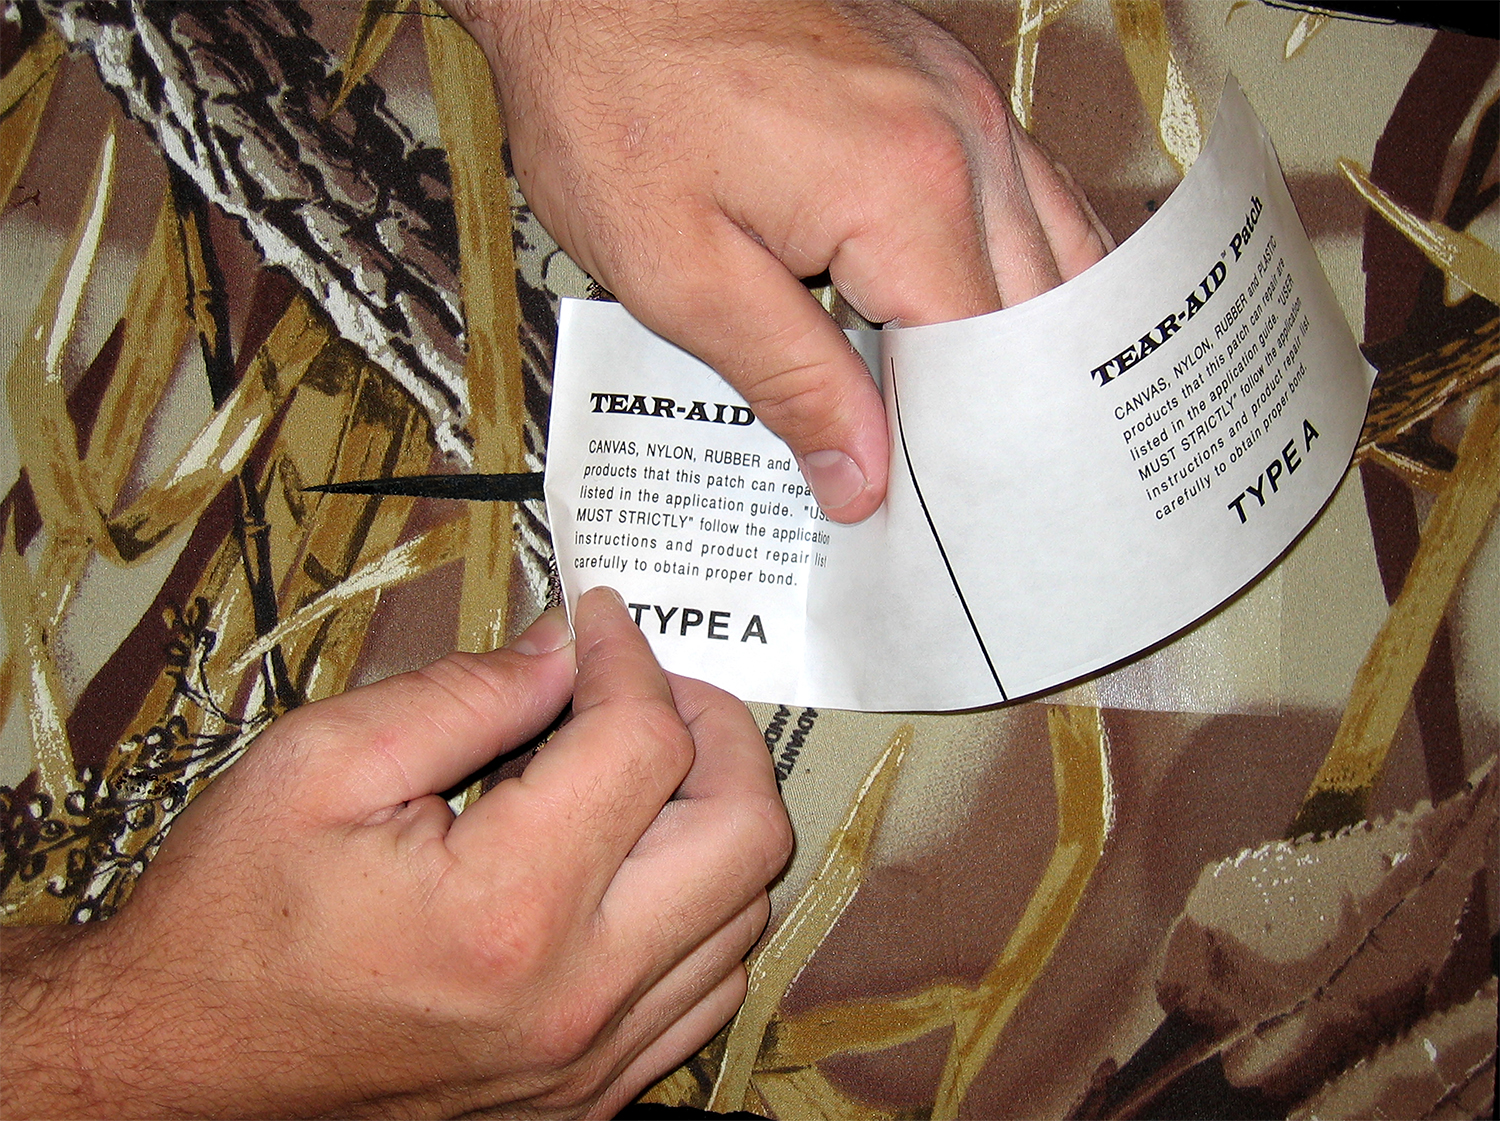
Type A feels extremely sticky compared to Type B but they both have the same adhesion capability. It takes Type B longer to have 100% adhesion because it takes Type B adhesive more time to move into the microscopic pores of the vinyl to get a lot of surface area to adhere to. Do not pick at the Type B patch within the first twenty-four (24) hours until it is fully (cured) adhered because you will be able to pull it off. Initial adhesion of Type B is generally high enough for immediate use of repaired product.
Type A Sticks To
Fabric Repair Categories
Clean and Prepare the Surface
Ensure the area around the tear is clean and dry.
Cut the Patch to Size
Cut the Tear-Aid® patch to cover the damaged area
Apply the Patch
Rub all edges to seal
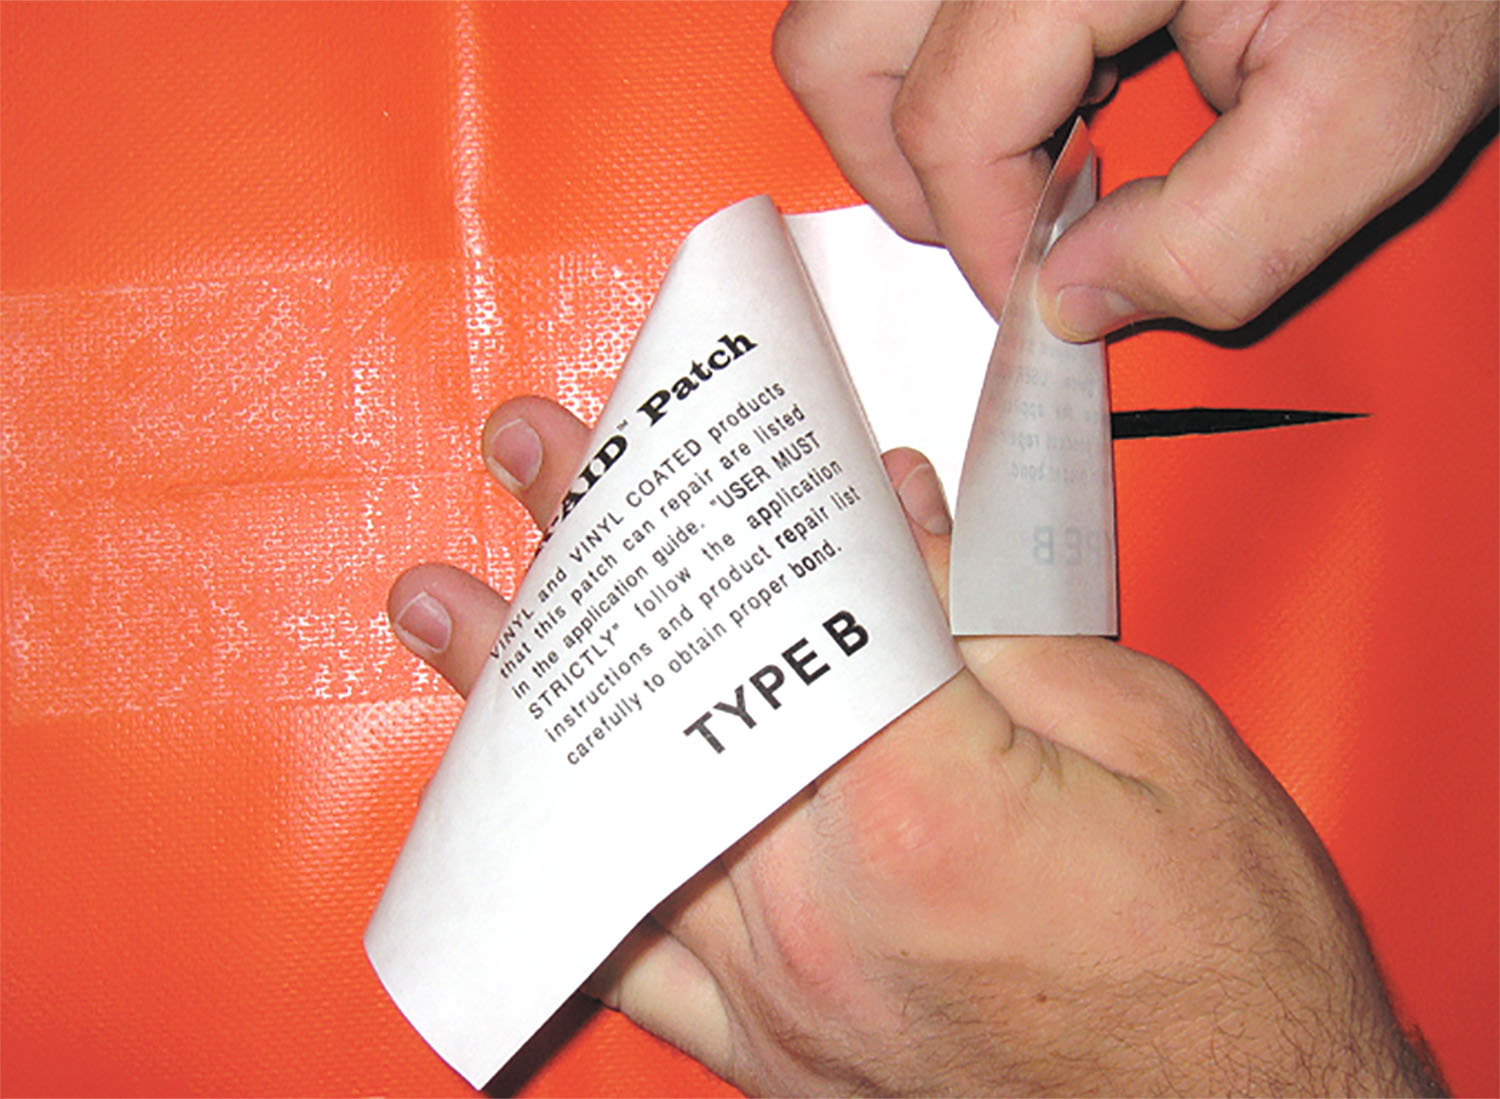
Type B Sticks To
Vinyl and Vinyl-coated ONLY
Clean and Prepare the Surface
Ensure the area around the tear is clean and dry.
Cut the Patch to Size
Cut the Tear-Aid® patch to cover the damaged area
Apply the Patch
Rub all edges to seal
Heat To Speed Up Curing Time (of Vinyl-Only Type B)
Heating is an option but normally not needed. For Tear-Aid Vinyl-Only Type B – to transform the good initial bond to an extremely high bond that would otherwise take 24 hours of curing time – After the patch is applied to the tear, briefly heat using an industrial heat gun that is set at approximately 350°F. Heat time will vary depending on size of patch and distance of the heat gun from patch. As the adhesive hot melt occurs, the patch see-thru clarity may change and appear easier to see-thru. This is an indication of over heating and the heat should be removed. Allow repair to cool before handling.
We Want To Help You
Clean and Prepare the Surface
Ensure the area around the tear is clean and dry.
Cut the Patch to Size
Cut the Tear-Aid® patch to cover the damaged area
Apply the Patch
Rub all edges to seal
Step 1
Clean the damaged area with an alcohol prep pad or a 50/50 mixture of water and isopropyl alcohol (rubbing alcohol) and let dry.
Step 2
Cut patch to the desired size with scissors allowing for the patch size to extend 1 inch beyond all edges of the tear. If you’re using more than 1 patch, allow for patches to overlap each other by at least 1 inch. Cut pointy corners into rounded corners.
Step 3
Carefully peel back half an inch of the backing from the patch at one of the corners.
Step 4
Position and rub down the exposed half inch patch corner allowing room to extend the patch 1 inch beyond all edges of the tear. Slowly peel backing from the patch while applying it over the tear. Take care to avoid air bubbles, and, also don’t stretch patch while applying. Once patch is entirely applied, rub down firmly over the entire patch to maximize adhesion. If there is access to the back side of the tear, repeat these steps. Repair is complete.
Dry Repair vs Underwater Repair
Dry Repair Tears And Holes
Cut:
Cut patch to size with scissors allowing for the patch size to extend 1 inch beyond all edges of the tear. If using more than one patch, allow for patch sizes to overlap at least 1 inch. Trim square corners into rounded corners.
Peel:
Carefully peel back 1/2 inch of paper liner. Tearing the paper liner while stretching the edge of the patch will help to seprate the liner form the patch - especially when the patch has been cut into smaller sizes.
Stick:
Position and anchor exposed 1/2 inch edge - allowing the patch to extent 1 inch beyond all edges of the tear. Slowly peel back the liner while carefully applying to patch over the tear - take care to avoid air bubbles. Rub all edges to seal. Rub entire patch aggressively. Follow Steps 1-3 on the back side of the repair if you have access to the back side. Repair is complete.

Underwater Vinyl Repair (With Vinyl-Only Type B
When applying underwater, apply to a smooth non-textured vinyl surface. Almost all pool liners are a good surface. Clean and scrub area larger than where patch is going to be applied to. Do not apply an uncleaned area. Do not foul patch in a scummy water application. If patch is partially above the water line, clean dry area with alcohol prep pads using the dry application instructions. It is important to squeegee the water out from between the patch and the Vinyl.
Cut patch to size with scissors allowing for the patch size to extend 1 inch beyond all edges of the tear. Trim square corners into rounded corners.
Do not foul the patch with your fingers, Carefully peel back 1/2 inch of paper liners.
Position the patch with the paper liner still on it underwater and anchor expossed1/2 inch edge allowing the patch to extend 1 inch beyond all edges of the tear.
Slowly peel back liner while carefully rubbing down with your fingers. Do not allow the patch to wrinkle. It is important to squeegee the water out from between the patch and the vinyl.
Use a firm squeegee to rub from center of patch outward in all directions firmly. Do not pick the patch. Full adhesion requires 24 hours.
Temperature
Approximate Range after application
Type A:
Type B:
Example repair list: Awnings, Pool liners, Pool Covers, Rain Gear, Sun Canopies, Waterbed Leaks, RV Awnings, Sleeping Bags, Auto Convertible Tops, Boat Covers, Tops & Seats, Truck Tarps, Inflatable Play Areas, Tents, Rain Flys, Duffel Bags, Totes, Mosquito Screens, Banners, Snowmobile Seats, ATV Seats, Boat Towables, Air Mattresses, Water Toys, Inflatable Pool Toys, Storage Covers, Soft sided Luggage, Kite Sails and Windsails, Inflatable Ads, Vinyl Windows, Vinyl Fabrics, Rain Gear, Sun Canopies, Fishing Waders, Gutters, Plant Tarps, Greenhouse Holes, Windbreakers, Lawn Mower Bags, Bounce houses, Medical beds, Restaurant Booths/Chairs, Camping Chairs/Tables, Gym Benches, Pet Carriers, Kayaks, and much much more!